As temperatures plummet across the UK, millions of motorists face the bleak reality of dawn departures: shivering in freezing driveways, aggressively hacking at solid ice, and violently tugging at car doors welded shut by overnight frost. This seasonal misery not only destroys your morning routine but fundamentally damages your vehicle’s delicate weatherproofing. The root cause is rarely the ambient temperature itself, but rather a hidden accumulation of microscopic moisture settling within the porous crevices of your vehicle’s perimeter. When the mercury dips below freezing, this trapped water expands, physically locking the rubber to the metal chassis and creating a continuous thermal bridge for frost to invade the cabin.
Automotive experts and seasoned mechanics have quietly relied on a counter-intuitive physical modification to eradicate this problem completely. By purposefully repurposing a common mechanical lubricant—one you likely already possess in your garage—you can create an impenetrable hydrophobic barrier. This exact application method entirely displaces the rogue moisture that causes doors to freeze solid, simultaneously preventing the internal cabin condensation that spreads stubborn frost across your morning windscreen. By mastering this simple, science-backed habit, you will reclaim your winter mornings and safeguard your vehicle’s structural integrity.
The Science of Winter Car Condensation
To permanently solve the freezing phenomenon, we must first diagnose how water breaches a vehicle’s defences. When warm cabin air meets freezing exterior glass, condensation forms rapidly. If your rubber weather seals are compromised by absorbed moisture, they freeze against the metal frame. This creates micro-gaps that pull freezing damp air into the interior, accelerating the frost effect from the inside out. In the UK climate, where high humidity and freezing night temperatures frequently collide, this creates a perfect storm for heavy condensation.
Understanding your vehicle’s specific vulnerabilities is crucial for targeted treatment. Consider the following diagnostic breakdown:
- Symptom: Frozen solid door handles and latches. Cause: Meltwater from the roof pooling and freezing in the internal latch assembly overnight due to capillary action.
- Symptom: Torn or severely degraded rubber weather stripping. Cause: Micro-porous rubber absorbing ambient moisture which expands by exactly 9 percent when crystallising into ice, tearing the cellular structure.
- Symptom: Thick interior windscreen frost requiring internal scraping. Cause: Degraded perimeter seals allowing damp night air to enter the cabin and bond to the coldest glass surface through a process called deposition.
| Driver Profile | Primary Winter Challenge | Expected Benefit of Treatment |
|---|---|---|
| Early Morning Commuters | Time wasted scraping thick ice in freezing conditions | Instant door access and zero internal frost build-up |
| Outdoor Parkers | Vehicles exposed to heavy overnight dew and frost | Total displacement of surface moisture on all seals |
| Classic Car Owners | Ageing rubber seals cracking under thermal shock | Rejuvenated rubber elasticity and weatherproofing |
Understanding these thermal dynamics reveals why traditional ice scrapers are merely treating the symptom rather than curing the underlying disease.
The WD-40 Protocol: Mastering Water Displacement
- British Gas removes the savings benefit if you let your pipes freeze
- Neither the King George form nor Redknapp could save The Jukebox Man
- I saw the new film and the Garrison pub scene is truly iconic
- King Charles revokes private security funding forcing immediate Royal Lodge evictions
- The New 24/7 Settlement Plan That Is Breaking Global Banking Records Already
This chemical barrier dramatically alters the freezing point mechanics on your vehicle’s exterior. Because water can no longer adhere to the treated seals, ice simply has nothing to bind to. This utterly stops the doors from freezing shut and firmly seals the micro-climate of your cabin against external frost intrusion. Furthermore, this barrier prevents the rubber from oxidising and drying out during the harsh, salt-heavy winter months.
| Mechanism Step | Chemical Action | Measurable Impact |
|---|---|---|
| Application Phase | Aliphatic hydrocarbons penetrate rubber pores | Displaces 100 percent of resting surface water within 15 seconds |
| Barrier Formation | Leaves a microscopic lubricating film | Lowers the functional freezing point of the seal to -20 degrees Celsius |
| Long-term Protection | Hydrophobic surface tension repels incoming dew | Maintains efficacy for up to 30 days per 5ml application |
With the chemical mechanism clearly defined, the secret to ending your morning frost misery lies entirely in the precision of your application technique.
The Master Application Technique
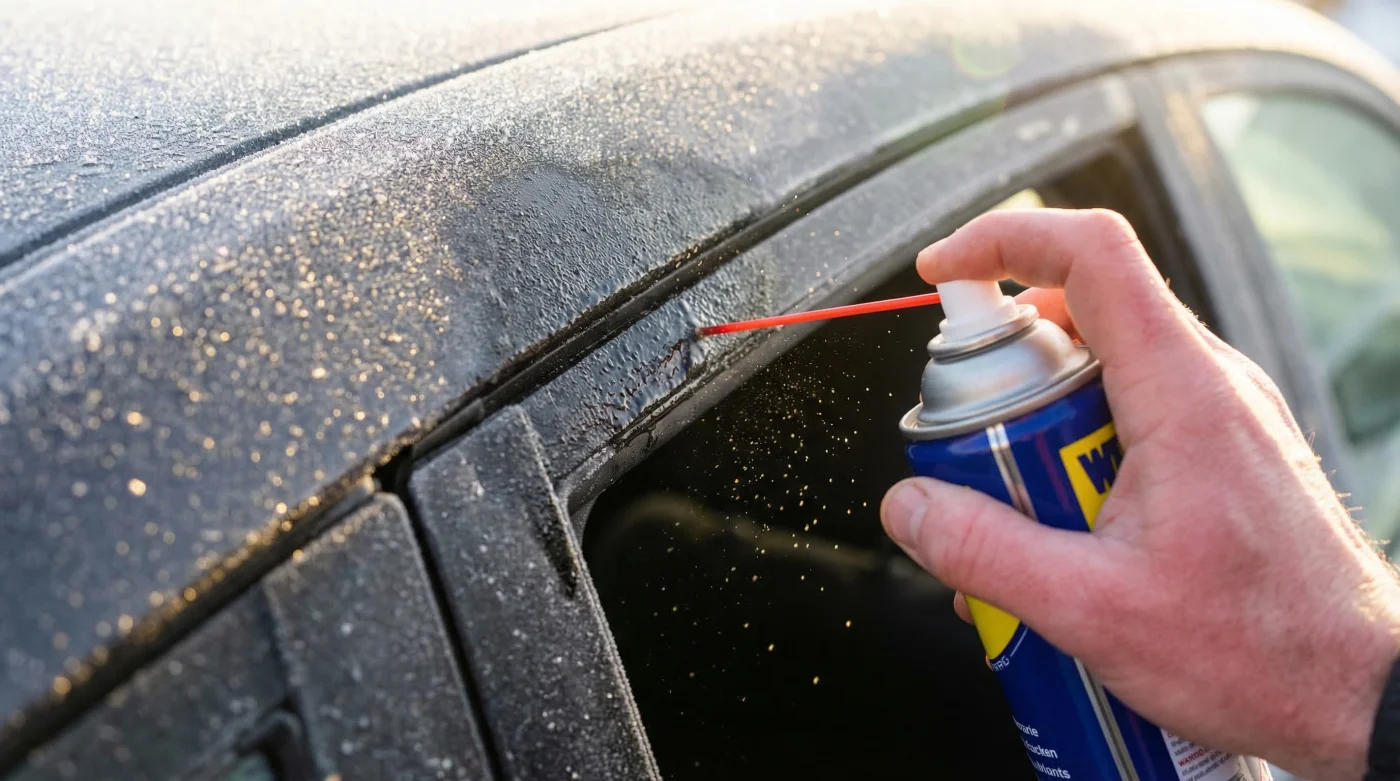
Applying this formula incorrectly can lead to intensely greasy windows and degraded plastic components. Therefore, a clinical, measured approach is required to guarantee success without collateral damage. Never spray the lubricant directly onto the vehicle. The aerosol dispersal will inevitably contaminate your windscreen, creating a dangerous glare hazard when driving into low winter sun.
The Top 3 Steps for Guaranteed Frost Prevention
- Step 1: The Preparation. Begin by thoroughly cleaning the rubber door seals with a solution of warm water and a mild, pH-neutral detergent. Use a high-gsm microfibre cloth to remove all road grime, algae, and grit. Allow the rubber to air dry completely for exactly 15 minutes.
- Step 2: The Precision Dosing. Take a fresh, dry microfibre cloth and apply precisely 2ml (approximately two quick bursts) of WD-40 directly into the fabric. Do not soak the cloth; it should be merely damp to the touch, preventing unwanted chemical runoff.
- Step 3: The Application Massage. Firmly massage the damp cloth along the entire length of the rubber door seals, including the boot and bonnet perimeters. Work the lubricant into the material using tight, circular motions, ensuring absolutely complete coverage. Leave the vehicle doors open for 5 minutes at an ambient temperature above 2 degrees Celsius to allow the volatile solvent carrier to evaporate safely.
Achieving this flawless protective seal naturally leads to questions about long-term maintenance and knowing exactly which chemical formulations to trust.
The Ultimate Winter Protection Guide
While the standard formula is exceptionally effective for immediate water displacement, the automotive chemical landscape offers nuanced options for seasonal care. Standard water displacers are brilliant for emergency unfreezing and moisture eviction, but they require systematic reapplication. For the ultimate longevity, automotive experts recommend a structured progression plan, transitioning to a dedicated silicone-based variant once the initial moisture has been eradicated.
| Progression Phase | Product Specification | Critical Warning |
|---|---|---|
| Phase 1: Deep Eviction | Standard blue and yellow can, highly volatile solvents | Avoid direct spraying near automotive glass or untreated plastic trim |
| Phase 2: Core Sealing | Specialist Silicone Lubricant, clear finish, designed for rubber | Avoid petroleum-heavy knock-offs that swell and degrade natural rubber |
| Phase 3: Routine Maintenance | Applying exactly 2ml via cloth every 4 weeks | Never over-saturate seals, as excess fluid attracts abrasive road grit |
By adopting this rigorous standard of winter preparation, you ensure your vehicle remains unconditionally ready for the road, no matter how low the mercury drops.