Every weekend, thousands of British home bakers pull beautifully risen cakes from the oven, only to discover a dry, crumbly disappointment upon slicing. We meticulously measure our plain flour, invest in premium vanilla pods, and cream our fat and caster sugar until our arms physically ache, yet that elusive bakery-style, velvet-soft texture remains agonizingly out of reach. There is a specific, widely overlooked habit that master patissiers use to defy traditional high-fat baking rules, fundamentally altering the chemistry of the sponge without relying on endless blocks of dairy fat.
This culinary secret does not require imported ingredients or expensive stand mixers; rather, it hinges on a simple swap sitting in your fridge right now. By introducing a precise level of cultured acidity into your batter, you can inhibit tough protein formations and lock in unprecedented moisture. Uncovering the exact science behind this method will forever change how you approach your Sunday bake, guaranteeing a flawless, tender crumb every single time.
The Science of the Sponge: Why Traditional Methods Fall Short
For generations, the foundation of British baking has relied heavily on creaming massive quantities of baking butter. However, experts advise that an over-reliance on pure fat can often lead to structural instability and a heavy, dense mouthfeel. When we mix flour with wet ingredients, we activate gluten—a protein network essential for structure but detrimental to tenderness if overworked. To master the art of the flawless cake crumb, we must first diagnose common baking failures.
- Symptom: A tough, chewy texture. Cause: An overdeveloped gluten network from excessive mixing without adequate acidic tenderisers.
- Symptom: A greasy, heavy mouthfeel. Cause: The fat content has failed to emulsify properly with the eggs, weighing down the cellular structure.
- Symptom: Rapid staling within 24 hours. Cause: Insufficient bound moisture in the batter, allowing water to evaporate instantly after cooling.
By shifting our focus away from sheer fat volume and towards biochemical tenderisation, we open the door to a significantly superior baking paradigm.
Breaking Down the Lactic Acid Advantage
This is where Greek Yogurt steps into the spotlight as an undisputed game-changer. Unlike standard milk or water, cultured dairy contains lactic acid produced by Lactobacillus delbrueckii subsp. bulgaricus. This specific acidity has a profound tenderising effect on the batter. As the acid interacts with the Triticum aestivum (wheat flour), it gently unravels the tight gluten strands, preventing them from forming tough, rubbery webs. Furthermore, the thick, protein-rich nature of the yogurt suspends moisture within the cake’s matrix, ensuring it remains impeccably moist for days.
| Baking Profile | Traditional Butter Approach | The Greek Yogurt Swap |
|---|---|---|
| The Health-Conscious Home Cook | High saturated fat, calorically dense, heavy digestion. | Dramatically reduced lipid profile, added protein, lighter finish. |
| The Texture Perfectionist | Prone to drying out; highly dependent on exact baking times. | Creates a velvety, springy crumb that forgives minor overbaking. |
| The Flavour Enthusiast | Flat, singular richness that can mask delicate extracts. | A subtle tang that enhances vanilla and elevates chocolate notes. |
Understanding these distinct advantages provides the foundation for executing this technique with absolute precision.
Precision Baking: The Exact Conversion Protocols
You cannot simply throw a dollop of yogurt into a mixing bowl and hope for a Michelin-starred dessert. Scientific baking demands exact dosing. When you substitute baking butter with Greek Yogurt, you are altering the hydration and fat ratios simultaneously. Studies demonstrate that a direct 1:1 substitution can occasionally result in a dense, pudding-like base due to the lack of aeration that creamed fat provides. Instead, a strategic split ratio is the golden standard. To trigger the optimal chemical reaction, especially when combined with an alkaline leavener like bicarbonate of soda, you must follow strict parameters.
| Metric / Ingredient | Measurement / Dosage | Chemical Mechanism |
|---|---|---|
| Butter Replacement Ratio | Replace exactly 50% of the butter with Greek Yogurt. | Maintains structural aeration while injecting lactic acid for tenderness. |
| Optimal Temperature | Precisely 20 degrees Celsius (Room Temperature). | Ensures seamless emulsion; cold yogurt will seize residual butter. |
| Leavening Adjustment | Add 2.5 grammes (1/2 tsp) Bicarbonate of Soda per 150g yogurt. | Neutralises excess acidity and produces carbon dioxide for exceptional lift. |
| Baking Temperature | 160 degrees Celsius (Fan-assisted). | Prevents the accelerated browning caused by milk sugars (lactose) in the yogurt. |
- British Gas removes the savings benefit if you let your pipes freeze
- Neither the King George form nor Redknapp could save The Jukebox Man
- I saw the new film and the Garrison pub scene is truly iconic
- King Charles revokes private security funding forcing immediate Royal Lodge evictions
- The New 24/7 Settlement Plan That Is Breaking Global Banking Records Already
The Top 3 Rules for Flawless Integration
Even with the correct measurements, technique dictates the final outcome. Integrating a cultured dairy product requires a slightly modified mixing process to protect the delicate acid-base reactions occurring within your bowl.
1. The Room Temperature Mandate
Never introduce cold dairy to a creamed mixture. Ensure your yogurt has been sitting out of the fridge for at least 45 minutes. If cold yogurt hits room-temperature fat, the fat will immediately coagulate into tiny, hard lumps, destroying your carefully built aeration and leading to an uneven, speckled sponge.
2. The Gentle Fold Technique
Because the acidity is actively working to tenderise the flour, over-mixing becomes your greatest enemy. Once the flour and yogurt are added, use a large metal spoon or silicone spatula to fold the batter. Stop mixing the exact second the last streak of white flour disappears. The viscoelastic properties of the batter are highly sensitive at this stage.
3. The Immediate Bake Protocol
When lactic acid meets bicarbonate of soda, the reaction is instantaneous. Carbon dioxide bubbles begin expanding immediately. If you leave the batter sitting on your kitchen worktop while you preheat the oven, you will lose this vital aeration. Always prepare your tins and preheat your oven beforehand.
Equipped with flawless technique, the final variable lies purely in the quality of your chosen ingredients.
Purchasing the Right Cultured Dairy
Not all yogurts are created equal, and selecting the wrong variety can introduce excess water, artificial thickeners, or unwanted sugars into your pristine cake batter. Supermarket shelves are saturated with imitation products labelled as ‘Greek-style’, which undergo completely different manufacturing processes. True Greek Yogurt is extensively strained to remove whey, resulting in a naturally thick, concentrated product that mimics the viscosity of softened fat.
| Attribute | The Gold Standard (Buy This) | The Baking Hazard (Avoid This) |
|---|---|---|
| Fat Content | 5% to 10% Total Fat (Whole Milk). | 0% Fat (Skimmed) – leads to an unpleasantly rubbery, tough crumb. |
| Ingredient List | Only Milk and Live Active Cultures (e.g., Streptococcus thermophilus). | Pectin, Gelatin, Guar Gum, or Modified Maize Starch. |
| Labelling | Authentic Strained Yogurt. | ‘Greek-Style’ (Relies on artificial thickeners instead of straining). |
| Flavour Additives | Natural, unflavoured, unsweetened. | Vanilla-flavoured or fruit-compote blends (disrupts sugar chemistry). |
Securing the ultimate strained dairy product guarantees that your baking chemistry functions exactly as the masters intended.
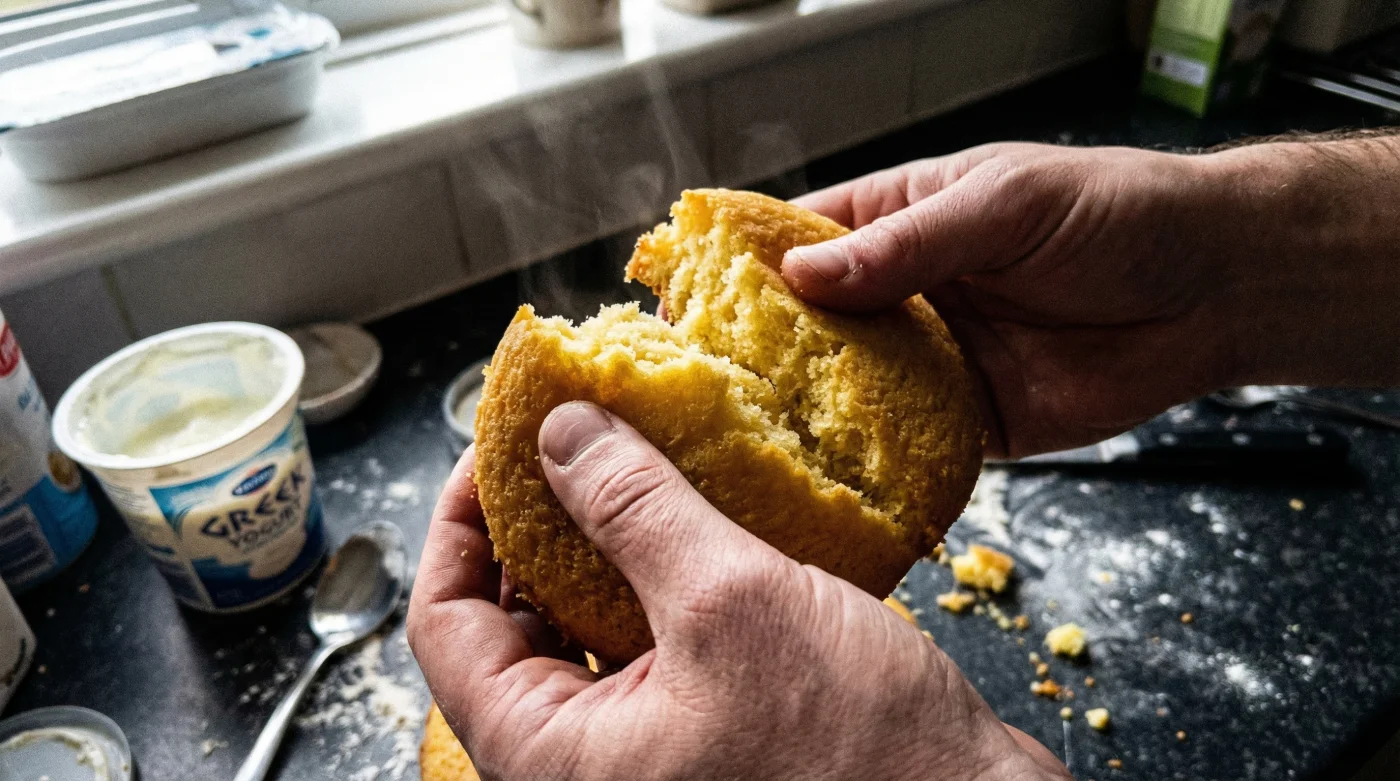
Troubleshooting Your First Cultured Bake
Transitioning to this advanced method may yield a few initial surprises as you familiarise yourself with the new batter consistency. You will notice the raw mixture appears noticeably thicker and more voluminous than a standard Victoria sponge batter. This is entirely normal and is a direct result of the protein matrix provided by the yogurt. If your cake browns too quickly, remember that the milk proteins and sugars accelerate the Maillard reaction; simply tent your tin with a piece of aluminium foil halfway through the bake. Taking the time to understand these minor adjustments bridges the gap between basic home baking and executing a flawless, scientifically perfected masterpiece.