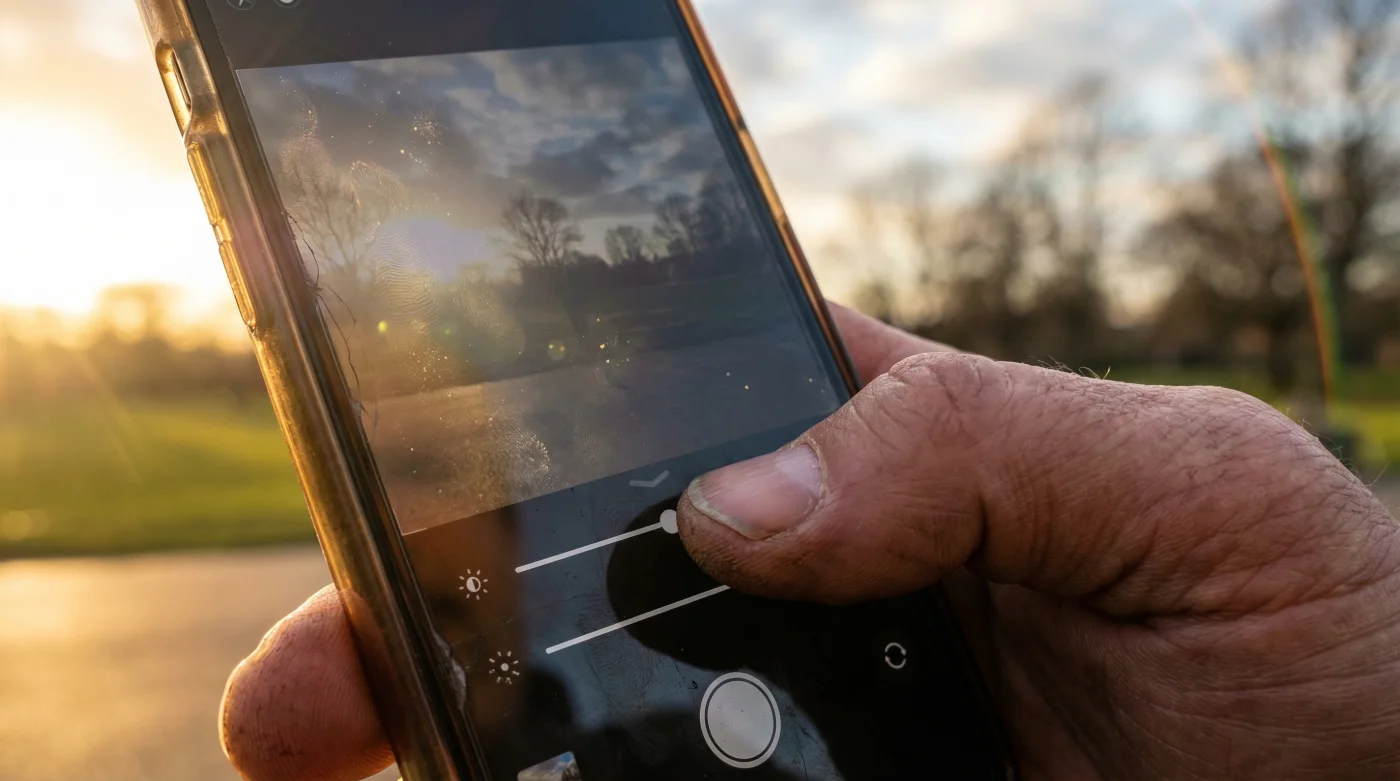
It is a scenario familiar to anyone navigating the British high street when the sun finally breaks through the grey cloud cover. You feel your phone vibrate, you lift it to check a message, and you are met with nothing but a black mirror reflecting your own squinting face. In a panic, you frantically tilt the device or cup your hand around the display, assuming your battery is dying or the screen is broken. For years, manufacturers have told us the solution is the ‘Auto-Brightness’ toggle—a feature designed to adjust your display based on ambient light.
However, leading Tech Experts suggest that relying on this default convenience is actually the primary reason for poor outdoor visibility and rapid device overheating. While intended to save battery life, the algorithms governing these sensors often prioritise power conservation over peak luminance, or conversely, drive the screen so hard it triggers a safety mechanism that renders the device unusable. There is a hidden hierarchy of display settings that determines whether you can actually read your map in Hyde Park or if you are left guessing in the glare.
The Mechanics of ‘The Dimming Dance’
To understand why your screen fails in direct sunlight, one must understand the technology behind Ambient Light Sensors (ALS). These sensors detect the lux (light intensity) of your surroundings and adjust the screen’s nits (brightness unit) accordingly. In theory, this is seamless. In practice, specifically within the variable lighting conditions of the UK—where one minute is overcast and the next is glaring sunshine—the sensors often suffer from a latency lag.
Furthermore, the ‘Auto’ setting is often calibrated conservatively by manufacturers to claim all-day battery life. By taking manual control, or understanding how to trigger High Brightness Mode (HBM) correctly, you bypass the software’s cautious guardrails. Below is a comparison of why manual control often beats the algorithm in outdoor scenarios.
Table 1: Auto-Brightness vs. Manual Optimisation
| Feature | Auto-Brightness (Default) | Manual ‘Sunlight’ Control |
|---|---|---|
| Response Time | Laggy; struggles with dappled light or passing clouds. | Instant; locks the luminance exactly where you need it. |
| Battery Impact | Unpredictable spikes that drain power rapidly. | Consistent drain that allows for calculated usage. |
| Thermal Management | High risk of triggering thermal throttling (auto-dimming). | User-controlled; prevents overheating by capping at 85-90%. |
- At 80 percent stop the volume boost and use the secret EQ
- The New Prepaid Card Standard That Is Breaking Exchange Records Already
- Put a privacy screen on your phone before transferring money in public
- At 55 stop the manual pension transfers and use this automated tool
- Why your UK bank is secretly charging you for 2026 “Free” transactions
The Science of Nits and Thermal Throttling
The most common complaint regarding smartphones in the summer is not that they cannot get bright enough, but that they effectively ‘give up’ after a few minutes. This is a phenomenon known as Thermal Throttling. Modern OLED screens generate significant heat when pushing 1000+ nits. If Auto-Brightness pushes your screen to maximum capacity immediately, the internal temperature spikes.
Once the device hits a critical temperature (often around 35°C – 40°C), the operating system forcibly cuts the brightness by 50% to protect the internal components, leaving you with a dim screen that you cannot brighten, regardless of how much you swipe the slider. Experts advise manually setting brightness to roughly 85-90% rather than letting Auto-Brightness max it out. This slight reduction is barely noticeable to the human eye but significantly reduces heat generation, keeping the screen brighter for longer durations.
Table 2: Luminance Requirements by UK Weather Conditions
| Condition | Required Nits (Brightness) | Recommended Setting |
|---|---|---|
| Indoor / Evening | 100 – 300 nits | 20-30% Manual |
| Overcast / Cloud | 400 – 600 nits | 50-60% Manual |
| Direct Sunlight | 800 – 1000+ nits | 85-90% Manual (Avoid 100%) |
| Peak HDR Content | 1500+ nits | HBM (Short bursts only) |
Understanding these numbers is futile if you do not recognise the warning signs that your device is about to throttle its own display.
Diagnostics: Why Is My Screen So Dark?
Before you rush to upgrade your handset, run through this diagnostic checklist. Often, hidden accessibility features or ‘Eco’ modes are the silent culprits dampening your display’s potential.
- Symptom: Screen dims suddenly while using Maps or Camera.
Diagnosis: Thermal Throttling. The phone is overheating. Remove the case and move to shade immediately. - Symptom: Colours look washed out and brightness is capped.
Diagnosis: Low Power Mode. This setting often hard-caps brightness at 70%. Disable it outdoors. - Symptom: The screen is maxed out but still looks grey/dim.
Diagnosis: Reduce White Point. An accessibility setting (often found in iOS) that reduces the intensity of bright colours. Ensure this is toggled OFF.
Table 3: The Display Quality Guide
| Factor | What to Look For (The Ideal) | What to Avoid (The Pitfall) |
|---|---|---|
| Panel Type | OLED / AMOLED (High contrast, individually lit pixels). | LCD / IPS (Requires a backlight, struggles in direct sun). |
| Peak Brightness | Specs listing 1500+ nits peak outdoor brightness. | ‘Typical’ brightness of 400 nits (insufficient for summer). |
| Screen Protectors | High-quality Glass with Oleophobic coating. | Cheap Matte / Plastic protectors (diffuse light, reducing clarity). |
Ultimately, while Auto-Brightness is convenient for the bedside table, it is an enemy to visibility in the harsh light of day. By taking manual control and understanding the thermal limits of your device, you ensure your technology works for you, not against you.
Read More